Alright, so, I have always had so much trouble with my skin. I have the worst blackheads, acne, whiteheads, etc. You name it, I have the problem. I have the worst combination skin ever! Parts of my face are so oily you could fry a chicken, and other parts are so dry that my skin will peel. In some cases, like around my eyes, my skin will even crack! It is so aggravating and sometimes very painful. I mean I know that I am still pretty young, but I feel that I am past the "teenage hormone acne" years. I have been to doctor after doctor for it, and nothing seems to work on my skin! So, I have decided to try something totally different.
I am gonna go all natural!
I have read a lot about natural face "wash," and, honestly, I am a bit skeptical! I am thinking of trying the "oil cleansing method." All that I have read about it makes me want to try it. I mean, the scientific reasoning behind it all really does make sense, but I really do have the most sensitive skin ever that breaks out over the tiniest little thing. The last thing I want is to speed up pimple production! So before I dive into that, I have decided to go natural in another way.... I'm going shampoo free! I feel that it makes sense that whatever I put on my head probably makes it way down onto my face eventually. And, along with the oily face, I have a serious oil factory on my scalp. Therefore, after reading about how shampoo and conditioner make this oiliness worse, I have decided to ax the store bought shampoo and conditioner.
This is the most informational article I have read. This lady is awesome! Some seriously awesome posts. That is also the "recipe" guide I followed to make my Poo free "poo."
I altered it a little because I have very thick, frizzy hair, and because I straighten it so much, the ends are so dry. I used just a touch more baking soda than she suggested and about double the apple cider vinegar.
Last night was my first night trying this method. I chose to try it for the first time after I got home for the evening because the last thing I would want is to wake up early for my shower then it backfire! I have to say, while I was actually showering and had the "poo" in my hair, I was trying to scrub it in and with the way it felt, all I could think was, "What the heck have I done, this does not feel right!" But I stuck with it and did the ACV rinse. I was shocked... After I got out of the shower and towel dried my hair, I went to it with a hair brush. Now, normally I have to spray in a leave in conditioner before I can even think about brushing my hair. But, much to my surprise, the brushing was rather easy! I proceeded to dry my hair as usual and it looked great! I was even more shocked this morning when I woke up. Normally the day after I wash my hair, my scalp is super oily! This morning.... looks like I just washed it! I think this whole 'poo free thing just might work for me!!!
Thursday, November 1, 2012
Oh, How I Love Halloween!!
So, I absolutely LOVE Halloween but, this year I was having
the hardest time trying to decide what in the world to be! I finally decided
that I would be a Loofah and my beau could be a bar of Soap!

To make my costume: I had an old pink romper in my closet
that I only use for a swim suit cover up so I thought I could use that as the
base to my costume. I went to Jo-Ann’s and got about 20 yards of pink netting
(not tulle, the netting looks more realistic). I also picked up a yard of white
rope, a cheap headband from the dollar store, a rubber ducky, and a TON of
safety pins! To make the actual Loofah, I just started at the top of the romper
with the netting and started pinning. (It would work out a lot easier if you
had a friend that could help so that someone could actually be wearing the
costume while you do this so that the fabric of the romper is stretched.) I
wrapped the netting around the romper, bunching it as I went. After I ran out
of netting, I found a good spot to pin the rope, pinned that, and then starting
“fluffing.” I just went around the costume and pulled apart the pieces of
netting that were too compact. Then, for a little something extra, I hot glued
a rubber ducky to a headband and wore that on my head.
To make his costume: I
got 2 pieces of white felt and used a hot glue gun to glue them together. Then,
I turned it inside out (it was sorta like a felt pillow case). Then I cut holes
for his arms and head. I then cut the word “SOAP” out of blue foam and hot
glued the letters to his costume. For a little something extra, I glued some
bubble wrap to his costume to look like bubbles.

All night people were telling us how awesome we looked and
kept asking for our picture. We even were selected to compete in the costume
contest and won 3rd place! Also, a woman that has her own natural
soap shop asked if she could photograph us for her website!
Saturday, July 28, 2012
Yo, What's fa dinna!?!?
So with times being so tough and all of the uncertainty of the future of our country's economy has all of us trying to save money any way that we can. I have recently really gotten serious about my couponing and that has really helped. But a couple of weeks ago, I really took a look at mine and Cooper's lifestyle and really tried to figure out a way to save more money for us. Well I was really astonished at how much we spent on food. We would either go out and grab from a restaurant or we would swing by the grocery store on a daily basis to pick up whatever we wanted to cook that night. Now, when you are talking about cooking for two, sometimes its more economical to just go and pick something up, especially if you are doing a daily grocery store visit like we were. That just gets so expensive.
When I really got to thinking about how I could help us to do better with that, the solution was so clear. I started to think about my Pinterest addiction and how many different, good recipes I see every time I get on there. It kind of made me think I was crazy for not really utilizing that tool that I have right at my fingertips! Then, I started to think about how I could really plan everything in advance and only make one trip to the grocery store per week. This really has to be planned out well though because everything I make has to be "Cooper Approved" because he is such a dang picky eater!
At this point, I decided the best thing for me to do would be to plan out the complete menu a week in advance (Um, Hello Carrie, people have been saying to do that forever... I know I am stubborn). I honestly thought that it just sounded time consuming and difficult.... really something I just didn't want to spend my time on. But then, when I gave it a go, I realized it is actually quite simple!
First, I went through all of the yummy things on Pinterest and I made a list of the items I thought Coop would like. Then, from that list I picked out the things that used a lot of the same ingredients (Because I hate spending so much on all the ingredients of something when you only need "1 tsp" or something and then the rest goes bad!) So, after I went through and narrowed it down, I downloaded this great weekly dinner planner, filled it in, and there ya go!
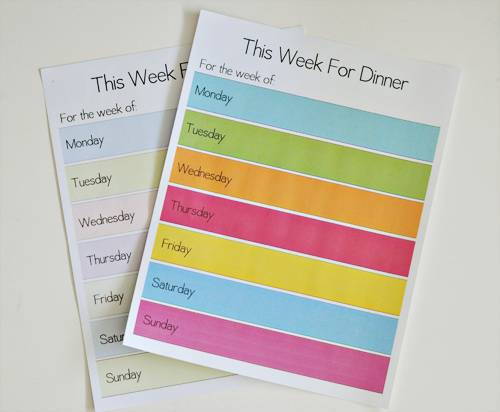 |
| http://www.thirtyhandmadedays.com/2011/09/meal_plan_printable/ |
Last week was our first week to try this and it was AMAZING!! Cooper and I only spent $100 total on everything needed for food this week. It was so great because most of it yielded leftovers or a few leftover ingredients that could serve great for lunch! It really made our lives a lot easier too because we weren't wandering around at 6pm every night worrying about what we were going to have for dinner or having to go pick it up. It was all right there, planned out for us, all ingredients in the fridge ready for us to cook! What a great feeling! I can't believe I didn't do this sooner!!!
Tuesday, July 3, 2012
That Is A Piece O' Junk!
One of my favorite places in the world is the Salvation Army. I mean, you can find some really cool stuff that is easy to revamp and it is usually all so cheap! So, yesterday I was riding around with the BF doing some work stuff with him when we passed the Salvation Army. Not thinking that he would even think about stopping in there with me especially when he had work to do, I commented on how I loved that place. Much to my surprise, he offered to take me! Such a sweet Cooper! I promised him that it would be very quick, that I just wanted to do a once over on the furniture. I can usually spot something I want by doing a quick 3 min walk through of the "home" section. Sure enough, I went through one time and spotted the most perfect thing..... A super awesome lamp for only $7.99!! (Well, it wasn't super awesome looking at that point but I knew that it definitely had loads of potential!
At this point I gasped because I was so excited at the great find. Then, Cooper gives me this look like "are you serious?" and I just ignore it and ask him to please grab it off of the shelf for me. He comments, "This thing is a piece of junk!" I, naturally, disagreed and tried to explain to him the potential that it held. He still didn't see it, and that is ok. I figured I would rather show him than sit there in the middle of the Salvation Army and talk him blue in the face trying to convince him. Last thing I said to him, "You just watch, less than a week from now and its gonna be awesome!"..... SO, while giving me this "you have gone crazy" look, he sets the lamp back down and starts to walk away... I say, "Babe, I mean I am going to buy it.. Why are you setting it back down?... I mean, its not gonna get any better sitting here." This gave me a pretty big laugh.
So, I proudly go pay for my "piece of junk" and start to brain storm on how I want it to look.
Yesterday, I went to Michael's to get some painting supplies. I ended up picking out a pretty light blue, a metallic silver, and a crystal clear to protect the color. I could not wait to get started on it, not only because it would be a fun project and end up looking nice, I really wanted to show Cooper that I was right.
This morning I decided to give it a go....
I got all of my paint supplies ready...
.jpg)


Now, I really liked this color but I wanted it to have more than just a plain, single toned color to it but I really didn't want to cover up this blue. So, not knowing what I was doing, I pulled out the metallic paint and got after it. I just held the spray paint can about 1-1/2 ft -- 2 ft away from the lamp base and started spraying, keeping the can moving constantly.


At this point I gasped because I was so excited at the great find. Then, Cooper gives me this look like "are you serious?" and I just ignore it and ask him to please grab it off of the shelf for me. He comments, "This thing is a piece of junk!" I, naturally, disagreed and tried to explain to him the potential that it held. He still didn't see it, and that is ok. I figured I would rather show him than sit there in the middle of the Salvation Army and talk him blue in the face trying to convince him. Last thing I said to him, "You just watch, less than a week from now and its gonna be awesome!"..... SO, while giving me this "you have gone crazy" look, he sets the lamp back down and starts to walk away... I say, "Babe, I mean I am going to buy it.. Why are you setting it back down?... I mean, its not gonna get any better sitting here." This gave me a pretty big laugh.
So, I proudly go pay for my "piece of junk" and start to brain storm on how I want it to look.
 |
| My lovely piece of junk! |
Yesterday, I went to Michael's to get some painting supplies. I ended up picking out a pretty light blue, a metallic silver, and a crystal clear to protect the color. I could not wait to get started on it, not only because it would be a fun project and end up looking nice, I really wanted to show Cooper that I was right.
This morning I decided to give it a go....
I got all of my paint supplies ready...
.jpg)
Then I got my lamp and covered the top part with a plastic bag and taped it in place...

Then I got a cup and filled it with warm, soapy water and got an old dish rag and cleaned her up real good!
After she dried, it was time to start painting!
I did several thin coats of the blue. It worked out really great because it is a fast drying paint so I didn't have to wait too long between coats (which is great because I am super impatient).


I really like the way the metallic turned out! I think it gave the lamp a little bit of depth without becoming too overpowering! After I was happy with the amount of silver on the lamp, I gave it a really good couple of coats of the crystal clear protective spray.
After the lamp dried and I unwrapped the electrical area at the top, I noticed how wobbly and outdated it was. It actually looked borderline unsafe so I decided that redoing the electric would probably be a good idea. I just went to Home Depot and got a Westinghouse 3-Way Socket Make-A-Lamp Kit ($9.95) and went ahead and replaced the electrical stuff. I was a little nervous I was going to have a hard time understanding and following the instructions for the lamp kit. Actually, it turned out to be quite simple. There was only one part that I wasn't quite sure about and a phone call to my handy dad fixed that right up!
At first I was planning to reuse the shade that came with the lamp but it just looked to disgusting, I would feel nasty every time I touched it no matter what I did to try to disinfect/revamp it. So I went to Target and bought one there. (Target is great for lamp shades because they have a lamp Mix&Match section so they have all sizes and styles, and they are all at pretty great prices!) I initially was thinking that I wanted like a beige or burlap drum shade but I ended up choosing this great charcoal grey medium sized drum shade. It looks really great with the colors of the lamp.
Here is the finished product:
Wednesday, June 27, 2012
Somethin' Smells Good!!
You know, if I had an endless amount of money, an incredible and huge kitchen, and all the time in the world, I could probably stock up my kitchen with all kinds of amazing ingredients and experiment until something good happened. But, that is just not reality so I generally go recipe hunting to find a yummy, healthy dish that doesn't require 80 ingredients that I will never use again that end up costing me $150. I also usually aim for something rather quick and easy. That is not always an easy task, especially because Cooper is SUCH a picky eater! So, when I see something that looks like it fits all my criteria, I jump on it! Welllll, low and behold, I'm on Pinterest the other day and I spot a yummy looking picture. I immediately click on it to find out that it is a simple little crock pot meal!! After reading the ingredients I realized, this was right up my alley!
Here is the picture of the dish I found on Pinterest:

I decided that it sounded like something that Cooper would eat and definitely something that fit into my budget and time schedule!
So, the next morning I went to the store and got the ingredients:
.JPG)
.JPG)
Here is the picture of the dish I found on Pinterest:

I decided that it sounded like something that Cooper would eat and definitely something that fit into my budget and time schedule!
So, the next morning I went to the store and got the ingredients:
- 4 boneless, skinless chicken breasts
- 1 bag of red potatoes (you only need 4-6, cut in half)
- 1 bag of baby carrots (you only need 1/2 bag)
- 1 bag of shredded Parmesan (you only need 1/2 cup)
- Italian Seasoning (I used Paula Deen's)
- 1 16 oz bottle of Italian dressing (I used low fat and I had to get the Newman's Own Organic Italian because Cooper insisted!)
As soon as I got home from the store, I got to work (not that it was much work). I got out my trustee ole crock pot and put a slow cooker liner (genius invention) in it. I then did exactly what the recipe said.... I poured a little of the dressing in the bottom of the pot, put in two of the breasts, put on a little bit more of the dressing, and sprinkled on some cheese and Italian Seasoning. Then I put the other two breasts in the crock pot (you gotta try not to stack them directly on top of the other two if possible), sprinkled on the rest of the cheese, dumped in the carrots, poured on some more Italian dressing, sprinkled on some Italian Seasoning, and then dumped in my potatoes followed up with the rest of the bottle of dressing and a little more Italian Seasoning. I put the top on that sucker and put him on low for 8 hours and BOOM, dinner is done!
Here is how mine turned out:
.JPG)
.JPG)
Although it doesn't look as pretty as the picture from Pinterest (nothing ever does), it was so delicious and tender, when I tried to get the chicken out of the crock pot, it literally fell apart! I served it with a lemon/olive oil salad and, Voila, a healthy dinner that Cooper and I both loved! Definitely something that everyone should try... You could definitely make it your own by throwing in different spices and herbs (not that it needs it) but the dressing definitely does a great job at flavoring the chicken AND keeping it from drying out!
Thank you to The Cook for blogging this recipe!
Monday, June 25, 2012
So... What's it supposed to be???
Last night I was on Pinterest, yet again, and I saw this great crock pot chicken recipe that I wanted to try (which I did and will write about in a later post) so I got up early this morning to go to the store to get the missing ingredients. Well... Of course you can't just go in Wal-Mart and only get what you originally came for. So, I got a few things to do a craft with. I actually got two clay pots and three different sized clay pot saucers.
Let me start off by showing you my inspiration...

Here are the supplies I had...
.JPG) Now, I already had the paint and the painting supplies.... So I painted the outside and bottom of the saucers and the clay pots chocolate brown. Then, I painted the inside of the saucers turquoise.
Now, I already had the paint and the painting supplies.... So I painted the outside and bottom of the saucers and the clay pots chocolate brown. Then, I painted the inside of the saucers turquoise.
Once everything had dried, I stacked them as shown in the picture and I just didn't like the way it looked... It looked a little too "homemade" to me. At this point I remembered that I had some little $1 candle sticks in my craft cabinet so I decided to use those instead.... here is how it turned out!
.JPG)

I think it turned out pretty dang cute except the way the glue dried on the candle holders! I don't like that you can see the white, foggy glue on the inside! I am trying to think of a cute way to cover that up.... Please comment your ideas!!
Let me start off by showing you my inspiration...

Here are the supplies I had...
.JPG)
Once everything had dried, I stacked them as shown in the picture and I just didn't like the way it looked... It looked a little too "homemade" to me. At this point I remembered that I had some little $1 candle sticks in my craft cabinet so I decided to use those instead.... here is how it turned out!
.JPG)

I think it turned out pretty dang cute except the way the glue dried on the candle holders! I don't like that you can see the white, foggy glue on the inside! I am trying to think of a cute way to cover that up.... Please comment your ideas!!
Who doesn't love the Salvation Army?!?!
For a while I have been wanting/needing some piece of furniture for my home. Something with drawers that I could put against a wall with a nice lamp on it or something. I just needed some storage, but I wanted something that looked nice too. Well, I am just too cheap to go buy something new. As luck would have it, I ran into the Salvation Army one day to see if they had anything worth getting and, sure enough, they had a great antique piece for $50 and it was actually on sale for $35! I was so stoked! It was definitely in rough shape but I knew I could get it looking better.... Or I could at least give it a try annnnnd it was a huge possibility that it would be an epic fail. Now, I didn't turn out exactly how I would have liked but I think it looks pretty good! So, here is how it went for me....
After I got the big honkin piece of furniture back home, I went to home depot and stocked up on supplies for my first project. I got:
One small can of beige paint
One small can of dark brown paint
Painting supplies
Primer
Sandpaper
.JPG) Because it is such an antique piece I really wanted to keep an old, worn feel with it so I was planning to distress it.
Because it is such an antique piece I really wanted to keep an old, worn feel with it so I was planning to distress it.
First step, I attempted to take off the pulls on the drawers (I was planning on replacing them) but I couldn't get them off. They were all rusted and some were bent a little and I really didn't want to mess up the wood trying to get them off so I just had to work around them. But if anyone has any advice on how to get those suckers off, please comment!
So, I moved on to priming. After I had her all primed up, I painted on a coat of beige paint. Once that was dry, I then painted on one layer of dark brown paint.
After all the painting was done, I sanded away at the top coat of paint to get the beige to show through. This was the finished product....
.JPG.crdownload) I wish I would have taken pictures throughout the process but I didn't know I was going to be posting about this. From now on, I will be taking pictures, step by step!
I wish I would have taken pictures throughout the process but I didn't know I was going to be posting about this. From now on, I will be taking pictures, step by step!
After I got the big honkin piece of furniture back home, I went to home depot and stocked up on supplies for my first project. I got:
One small can of beige paint
One small can of dark brown paint
Painting supplies
Primer
Sandpaper
.JPG)
First step, I attempted to take off the pulls on the drawers (I was planning on replacing them) but I couldn't get them off. They were all rusted and some were bent a little and I really didn't want to mess up the wood trying to get them off so I just had to work around them. But if anyone has any advice on how to get those suckers off, please comment!
So, I moved on to priming. After I had her all primed up, I painted on a coat of beige paint. Once that was dry, I then painted on one layer of dark brown paint.
After all the painting was done, I sanded away at the top coat of paint to get the beige to show through. This was the finished product....
.JPG.crdownload)
Subscribe to:
Posts (Atom)